How to deploy a voting smart contract Dapp
This tutorial will guide you through the process of deploying a voting smart contract Dapp on the Calimero network.
Prerequisite
Before you begin, ensure that you have the following prerequisites in place:
- Set up your Calimero private shard
- A code editor like VSCode
- Install the NEAR CLI tool
- Install Node.js and npm on your machine.
- Install the Rust and WASM toolchain
Step 1: Build the smart contract
- Clone the Calimero examples repository by running the following command in your terminal:
git clone https://github.com/calimero-is-near/calimero-examples
- Navigate to the
privatedirectory inside thevotingfolder.
cd calimero-examples/voting/contracts/private
- Compile the Rust smart contract to WASM by running the following command:
./build.sh
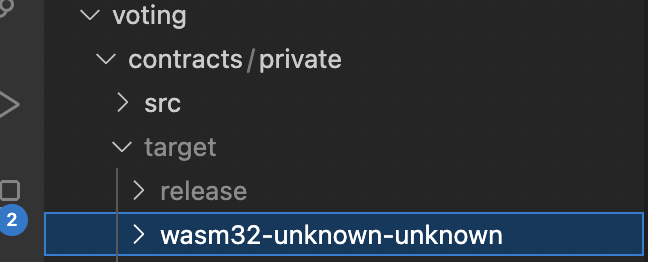
Once the compilation is complete, the compiled .wasm file of the contract will be located at:
target/wasm32-unknown-unknown/release/poll.wasm
Step 2: Generate an auth token
Before deploying the voting smart Dapp, you need to generate a Calimero auth token. This token will authenticate and authorize external applications to communicate with your shard.
Follow the steps provided here to generate an auth token for your Calimero shard.
Step 3: Set up the NEAR CLI
To interact with your Calimero shard using NEAR CLI, set the token value using the command near set-api-key.
Follow the steps provided here to set up the NEAR CLI.
Step 4: Create a keypair
A keypair for a shard account consists of a public key and a corresponding private key. To generate a new keypair for the shard account:
- Set the SHARD_ID environment variable in your command-line interface
export SHARD_ID="your_shard_name"
Make sure to replace "your_shard_name" with the name of your shard.
- Run the
near generate-keycommand to generate a key for your shard
near generate-key $SHARD_ID.calimero.testnet --networkId $SHARD_ID-calimero-testnet
- Navigate to the
~/.near-credentials/folder to locate the generated keypair file which is in a.jsonformat. Alternatively, you can locate it by running the following command in your terminal:
cd ~/.near-credentials/network-id/account-id.json
Take note of the account_id, private_key, and public_key values from the .json file.
Step 5: Create sub account
Create a sub account that will be used to deploy the previously built contract. This sub account should be created from the Custodial account in the Calimero Console, and the public key gotten from the generated keypair should be added to the subaccount.
Follow the steps here to set up the sub account and add public key.
Step 6: Deploy your NEAR contract
To deploy your contract to the private shard, follow these steps:
- In your cloned repository's directory, open the
deploy_calimero.shfile. - Set the following variables in your command-line interface:
export SUB_ACCOUNT="your_sub_account"
export CALIMERO_RPC_NODE_URL="your_calimero_rpc_node_url"
export SHARD_ID="your_shard_name"
Make sure to replace "your_sub_account" with the name of your sub account, "your_calimero_rpc_node_url" with the NEAR RPC endpoint obtained from the Calimero Console dashboard, and "your_shard_name" with the name of your shard.
- Run the
near deploycommand to deploy the application:
near deploy \
  --accountId "$SUB_ACCOUNT" \
  --initFunction new --initArgs '{"question": "Which blockchain is best?", "options": ["NEAR","Bitcoin"]}' \
  --wasmFile target/wasm32-unknown-unknown/release/poll.wasm \
  --nodeUrl "$CALIMERO_RPC_NODE_URL" \
  --networkId "$SHARD_ID-calimero-testnet"
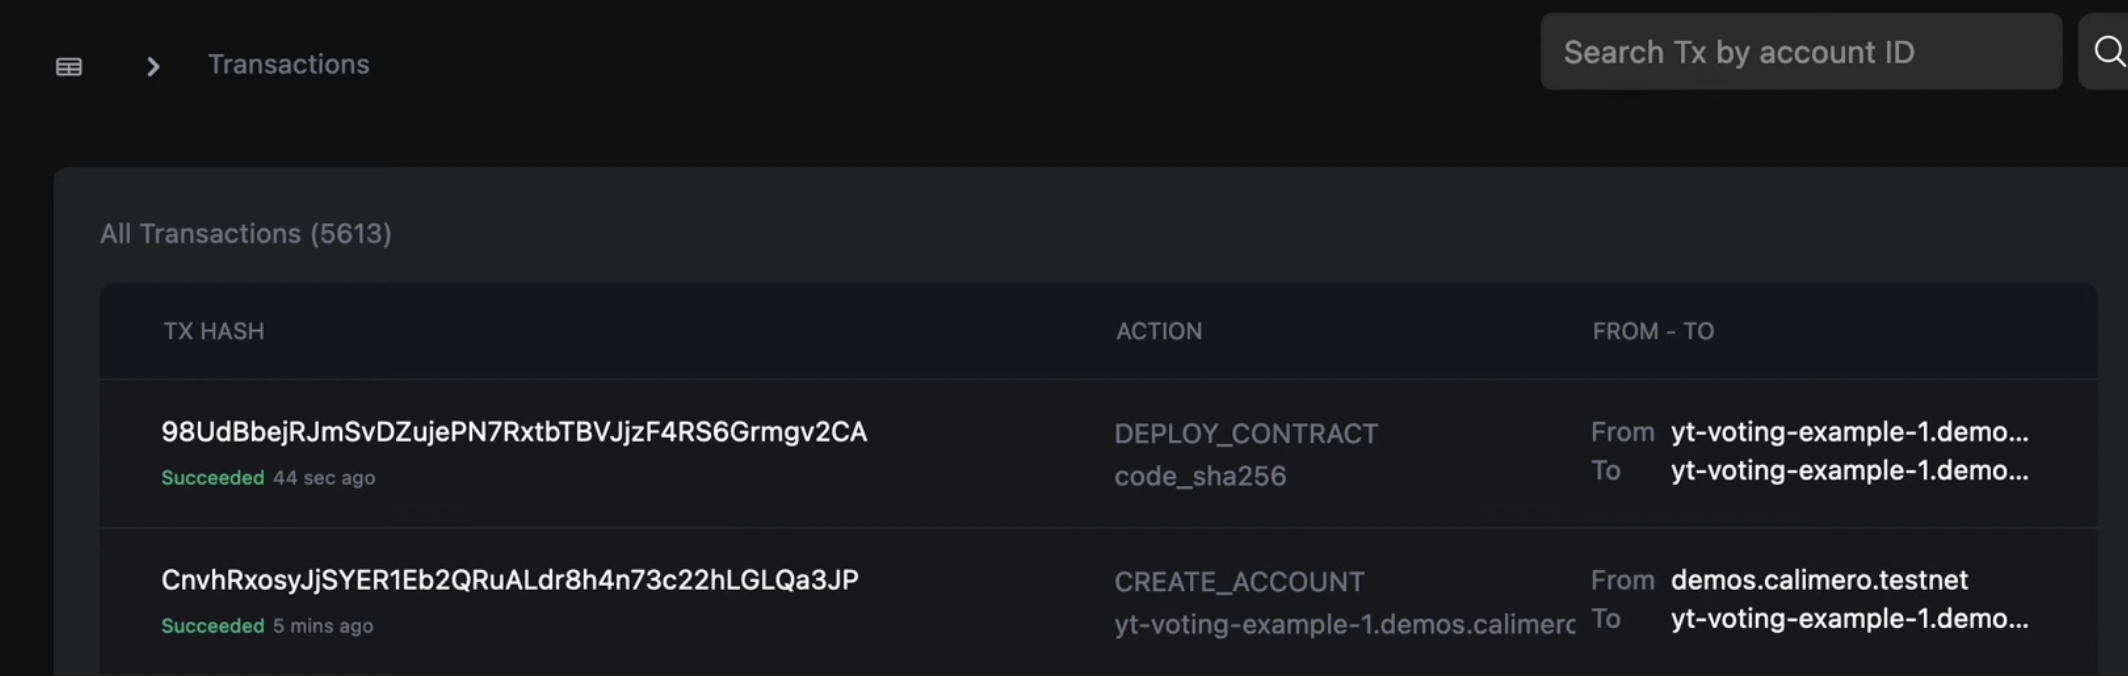
The command will deploy the application to the NEAR contract using the provided parameters. You can check the deployed contract on the Explorer > Transactions page.
Step 7: Update the config file and start the Dapp frontend
To set up the frontend of your Dapp, follow these steps:
Locate the
calimeroSdk.tsfile in the frontend code.Configure your connection settings in the
calimeroSdk.tsfile.

It is recommended to use environment variables (.env) to store these settings.
The required configuration properties are:
- NEXT_PUBLIC_CALIMERO_URL: This is the RPC endpoint used for syncing accounts and querying shard data. You can find it on your Calimero Console dashboard under the endpoints table
- NEXT_PUBLIC_CALIMERO_TOKEN: This is the auth token you generated earlier from the console.
Run the following command to start your localhost server:
$ yarn install && yarn dev
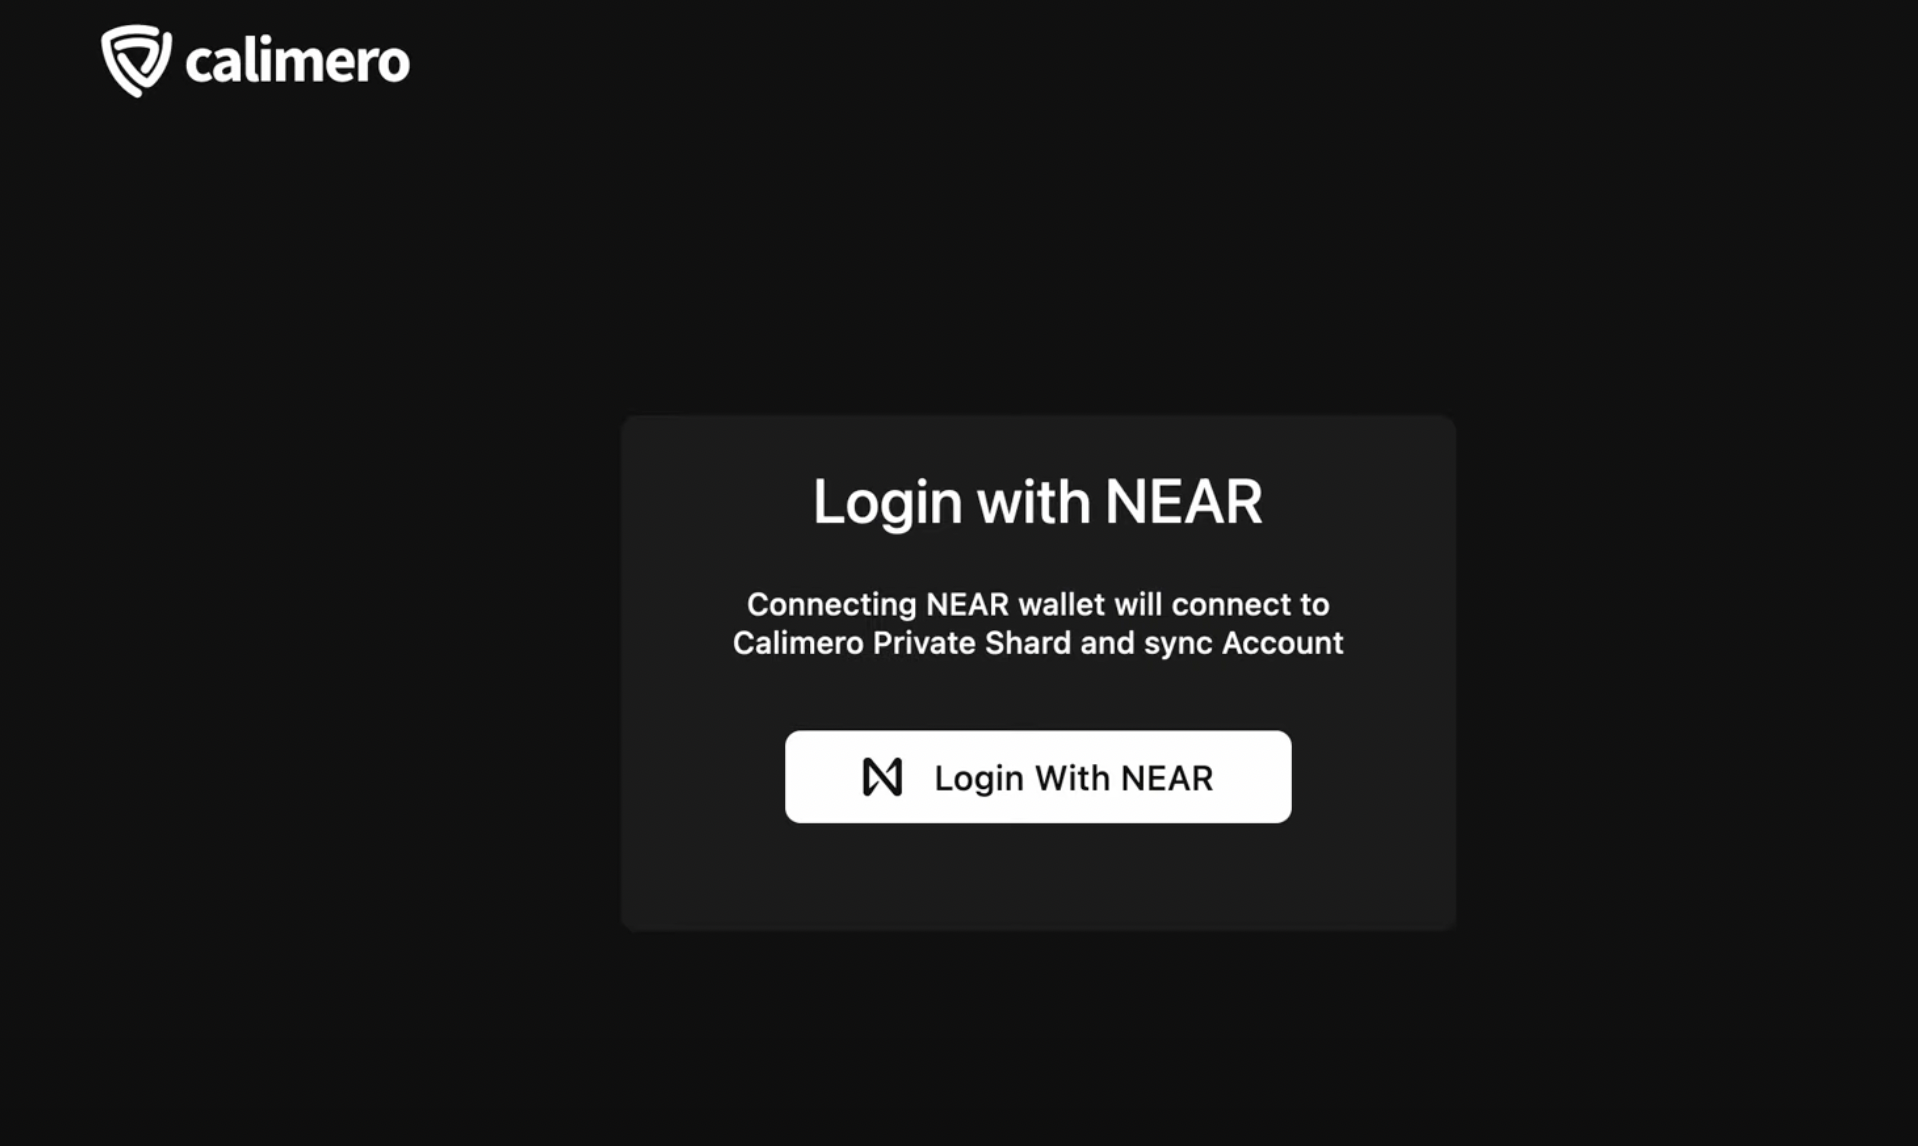
- Access your Dapp frontend through http://localhost:3000 and click Login with NEAR.
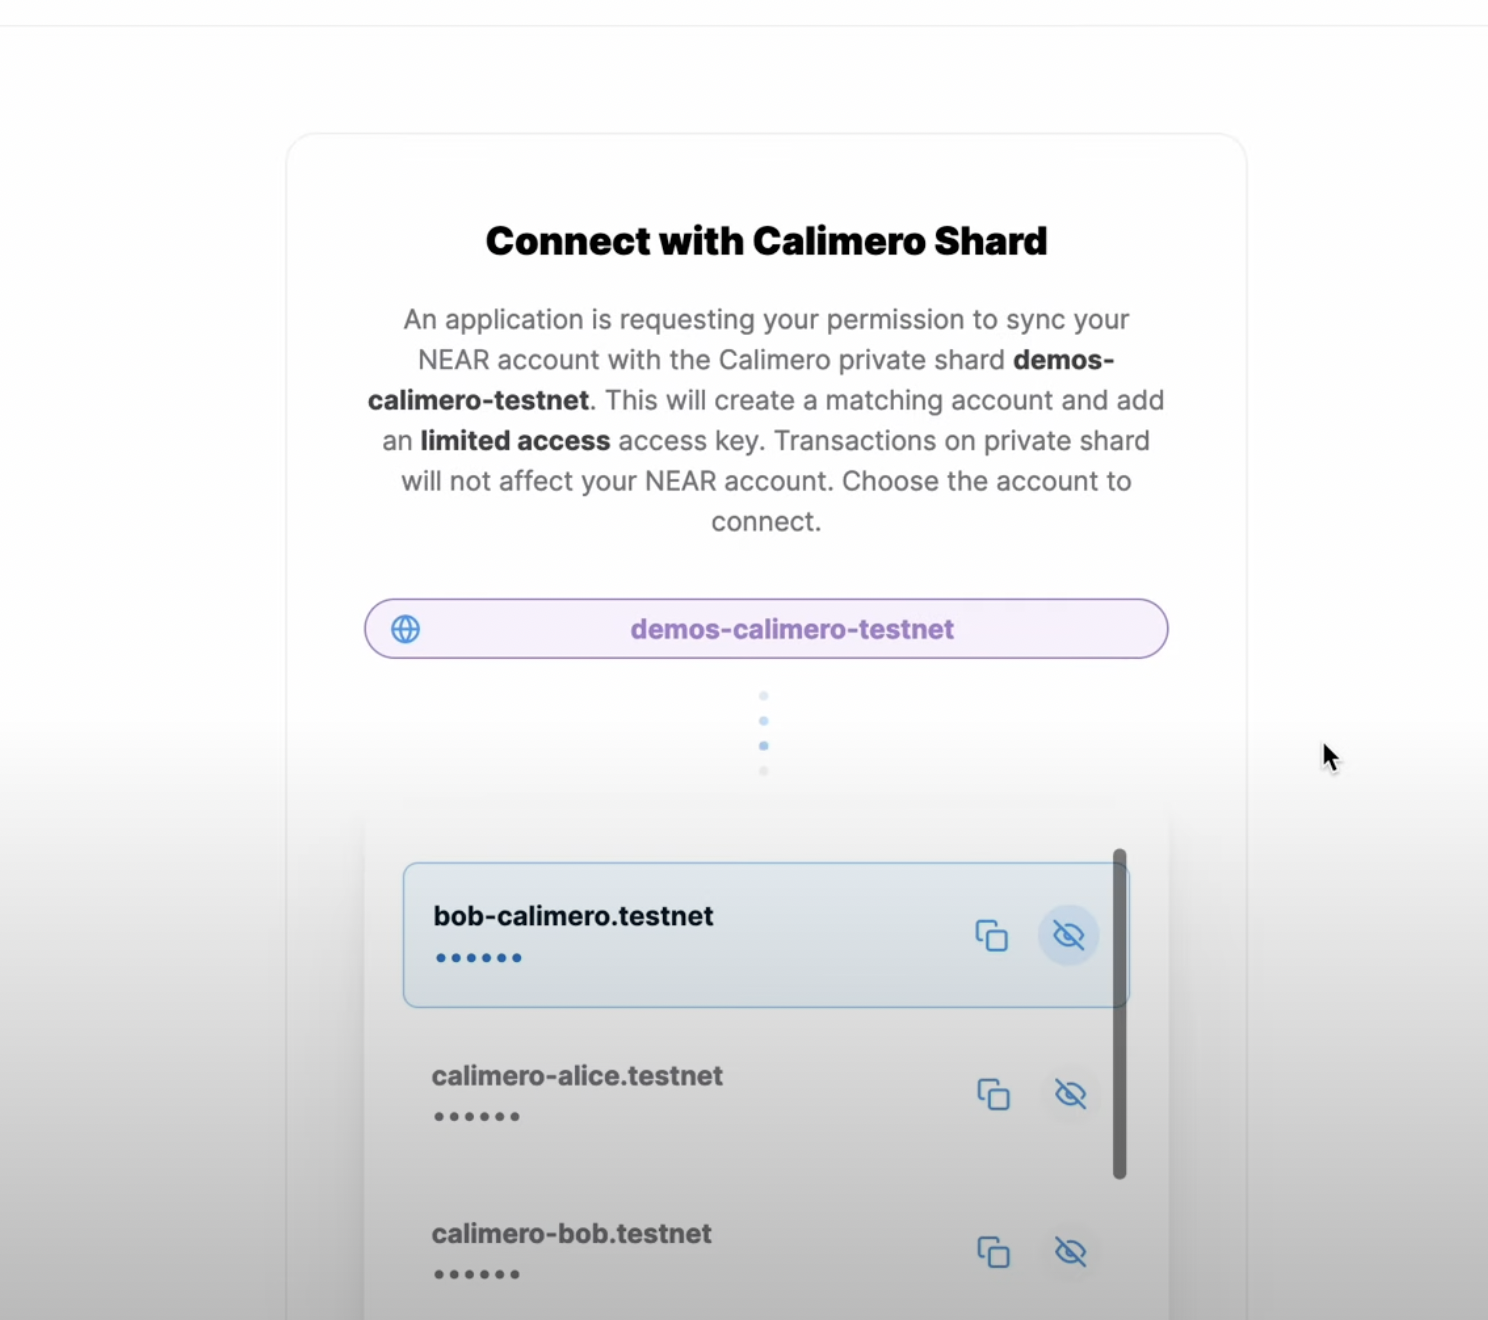
- Connect your shard by clicking on Connect, and select the desired account to participate in the poll.
- Click on any of the options and observe the immediate display of the results.

You can click on any of the options and also switch accounts to to click on the poll. Your result would be displayed immediately.

Congratulations! You have successfully deployed a voting application that can access shard contracts on the Calimero Network.